Presenting on Camera: What Does It Cost?
You press the record button. The red light comes on. Suddenly, every sentence feels stiff. Many freelancers, spokespeople, and managers struggle with this. They ask a fair question: what does it cost to truly overcome this tension when presenting on camera? People often think a professional workshop is an unnecessary expense. After all, you can just put a smartphone on a tripod and practise for free. This rarely works out. Fumbling by yourself secretly wastes huge amounts of time. It causes frustration and leads to videos where your message never quite hits home.
In this practical guide, we address these doubts step by step. We look at where the costs come from. We also show what focused training truly gives you. And we explain how you can work towards a relaxed, credible presentation on camera.
First: The Hidden Costs of Trying It Yourself
If you decide to record videos without guidance, you usually only consider the direct expenses. These include a camera, a lavalier microphone, and a light. However, the biggest cost lies in the hours you lose afterwards. In the studio, we regularly see speakers who have already recorded forty takes of the same video at home. Each time, there was a hesitation. Their eyes drifted away from the lens. Or the explanation sounded too forced.
If you spend hours editing, piecing together clips that should have been delivered in one smooth take, you lose a lot of money in wasted work time. You also risk losing potential customers. This happens if your video comes across as distant or uncertain. Learning how to be relaxed on camera is not a luxury. It is an investment that pays for itself in time saved and a professional image.
Here is a practical tip for this stage: keep track of how many takes you need for a short two-minute video. If it is more than four, you are spending more time on retakes than on preparing your content.
Next: What Determines the Price of Camera Training?
If you are considering sharpening your speaking skills on camera, the fee depends on several content-related factors. A large online course where you only watch videos requires a different budget. This is different from an intensive day in a real recording studio with an experienced instructor.
With professional practical training, you pay for several specific things:
- An expert instructor provides feedback on your specific speaking style, your facial expressions, and your physical composure.
- You work with professional equipment. This includes a studio camera, professional lighting, and a real teleprompter.
- Group size: in a small group, everyone gets enough speaking time on camera. This means the learning outcome is much greater than in a crowded room.
- You get direct analysis of your recordings. You see straight away what happens when you apply a tip.
Below you will find an overview of the typical guide prices for our professional training courses and workshops.
Here is a practical tip for this stage: do not choose a general theory course if you have camera shyness. You only learn on-camera skills by speaking yourself and immediately seeing what works.
Then: What Do You Learn During Practical Camera Training?
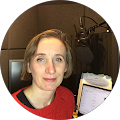
Camera training is a practical session. Here, a speaker learns to communicate purposefully, calmly, and naturally to a camera lens. Our 'Presenting on Camera' workshop is led by instructor Kristien. It focuses on the interaction between technique and body language.
You will learn three essential pillars here. These make the difference between a stiff delivery and a warm conversation with your viewer:1. Master the autocue technique. Reading text without your eyes darting from side to side requires a specific technique. You will learn how to control the scroll speed and how to read while maintaining a natural tone of voice. 2. Control your body language. Small tics are magnified on camera: swaying, fidgeting with your fingers, or even freezing up. You will learn how to stand firmly, relax your shoulders, and use hand gestures effectively to support your words. 3. Make genuine eye contact with the camera. A camera lens is just a cold piece of glass, but there is a person watching. You will learn to imagine you are talking to one specific person. This will make your gaze softer and more approachable.
In the studio, speakers often try to pronounce every word perfectly from the script during their first take. This can feel stiff. As a director's tip, we always advise: breathe out calmly through your mouth just before the recording starts. Look into the camera as if it were a good friend, and only begin speaking when you feel a sense of inner calm. That one second of silence at the start will help your shoulders drop and make your tone of voice sound relaxed immediately.
Here's a practical tip for this stage: do not write your script like an academic paper. Instead, use conversational language with short sentences and clear breathing pauses.
Finally: how to prepare for your first studio day
If you want to get the most out of your training, it is best to prepare specifically. Good preparation means you will enter the studio feeling less stressed. You will also get more benefit from your instructor's feedback.
Go through these practical steps beforehand:
- Choose a recognisable case from your own work. Prepare a short introduction or explanation about a topic you know inside out. This way, you will not have to think about the content during the training. You can focus entirely on your presentation technique.
- Pay attention to your clothing choice. Avoid fine stripe patterns or busy checks. These can create a distracting flickering effect on camera. Choose solid colours that do not blend in with the studio's background.
- Practise your text aloud without a screen. Listen to your speaking pace. People often speak twice as fast on camera due to nervousness. By calmly saying the text aloud a few times beforehand, you will program your speech muscles for a pleasant rhythm.
- Write down keywords instead of a rigid script. Unless you are specifically training on the autocue, cue cards with keywords will give you much more freedom to speak spontaneously.
Here's a practical tip for this stage: get enough sleep the night before your recording day. Tiredness often shows around the eyes first. A well-rested voice naturally has more resonance and warmth.
Listen to voices
Loading demos…
Frequently asked questions
How quickly do you see results after camera training?
Almost immediately during the training day itself. You receive immediate feedback from the instructor after each recording and review your own footage, allowing you to apply corrections immediately. Most participants notice a clear difference in calm, eye contact, and persuasiveness by their second or third take.
Do I need to have prior video experience to participate?
No, that is absolutely not necessary. Our workshops are designed to guide both beginners who have never been in front of a camera and more experienced speakers who want to refine their technique, at their own level. The safe setting of a small group allows everyone to comfortably make mistakes.
What if I freeze up as soon as the camera starts rolling?
That is a perfectly normal physical reaction that even experienced professionals sometimes face. During the workshop, you will learn targeted breathing and grounding techniques to neutralise that acute tension, helping you calmly regain control over your voice and thoughts.